Redux demystified: understand its implementation
Understand how exactly redux works, along with the implementation of the createStore method

I am a web developer with a specialization in frontend with 6 years of experience. Currently working as a Computer scientist I (SDE3) at Adobe. Previously SDE3@Walmart.
If you are a React dev, you may have used or heard of Redux. Yup, I know that Redux is framework agnostic and can also be used with plain javascript. But mostly it is used with React applications.
If you already have used Redux, forget everything that you know about it (for a while of course), and let's understand state management from the very basic.
What is a state?
In the most basic terms, a state is anything in the UI that changes over time. For example - there is a product listing page - when you search, sort, or filter these products, you see different products on the same product listing page. Also when you log in to a website you see your profile details but when someone else logs in to the same website they see their details.
I hope you understood what is a state.
Redux is a state management library, which helps manage state in complex web applications.
Usually, any state management library is built with the - "Observer Design Pattern" and redux also implements the same design pattern to help manage state. If you want to understand the Observer design pattern in detail, I have linked my article where I explain it in detail with a real-world example. I would highly recommend you to read it to understand the redux implementation better.
Understand Redux
The redux has one main method known as createStore which accepts one parameter - a reducer function.
Let's first understand the reducer function
Reducer
A reducer is a pure function, which accepts two parameters - state and action, and based on the action it returns the new state.
(state, action) => newState
// A reducer's function signature
A pure function is a function whose return value depends only on the parameters of the function and does not cause a side effect. You can understand it in detail here
Let's write a simple reducer function,
const avengersReducer = (state = [] , action) => {
    switch (action.type) {
        case 'ADD_AVENGER':
            return [...state, action.payload.avenger]
        case 'REMOVE_AVENGER':
            return state.filter(avenger => avenger.id !== action.payload.id)
        default:
            return state
    }
}
The action object should conventionally contain a type property based on which we can update the state accordingly. An action object can optionally have a payload object which will include details to be changed in the existing state.
Here we see that there are two types of actions expected to respectively add and remove an avenger. The payload includes the details of the new avenger in case of adding a new member and includes the id of the existing avenger in case of removing a member.
Since the reducer is supposed to be a pure function we cannot update the state object we get as a param, but we create a copy of it, usually by spreading the state. Then override the copy of the state and return the updated copy of the state.
Now let's pass this reducer to createStore()
createStore
const store = createStore(avengersReducer)
const { getState, dispatch, subscribe } = store
The createStore() returns an object, which can be called as the store, that contains three methods
- getState: this returns the current state object
- subscribe: this will subscribe a function that will be executed when the state updates
- dispatch: this will accept an action object based on whose type the reducer updates the state
You can now relate these methods with the methods used in the Observer design pattern.
Avengers app
Let's now understand how we can manage the state in a plain javascript app with redux.
<!DOCTYPE html>
<html lang="en">
<head>
<meta charset="UTF-8" />
<meta http-equiv="X-UA-Compatible" content="IE=edge" />
<meta name="viewport" content="width=device-width, initial-scale=1.0" />
<script src="https://cdnjs.cloudflare.com/ajax/libs/redux/4.2.0/redux.min.js" integrity="sha512-1/8Tj23BRrWnKZXeBruk6wTnsMJbi/lJsk9bsRgVwb6j5q39n0A00gFjbCTaDo5l5XrPVv4DZXftrJExhRF/Ug==" crossorigin="anonymous" referrerpolicy="no-referrer"></script>
<title>Avengers Assemble</title>
</head>
<body>
<main class="avengers">
<label for="name">Avenger Name:</label>
<input
type="text"
id="name"
autocomplete="name"
placeholder="enter avenger name"
/>
<button id="add">Add</button>
<ul class="avengers-list">
</ul>
</main>
<style>
.avenger,
.avengers,
.avengers-list {
display: flex;
justify-content: center;
align-items: center;
}
.avengers,
.avengers-list {
flex-direction: column;
}
.avenger {
gap: 10px;
}
</style>
<script>
// reducer function
const avengersReducer = (state = [], action) => {
switch (action.type) {
case 'ADD_AVENGER':
return [...state, action.payload.avenger]
case 'REMOVE_AVENGER':
return state.filter(
avenger => avenger.id !== parseInt(action.payload.id)
)
default:
return state
}
}
const { getState, dispatch, subscribe } = Redux.createStore(avengersReducer)
const avengersList = document.querySelector('.avengers-list')
const input = document.querySelector('#name')
const addAvenger = document.querySelector('#add')
let count = 0
// enter key event handler
const enterAvengerHandler = e => {
if(e.key === 'Enter')
addAvengerHandler()
}
// add button click event handler
const addAvengerHandler = () => {
                dispatch({
                    type: 'ADD_AVENGER',
                    payload: {
                        avenger: {
                            id: ++count,
                            name: input.value,
                        }
                    },
                })
                input.value = ''
            }
// function to render the avengers list on state change
const renderAvengers = () => {
const avengers = getState()
avengersList.innerHTML = ''
const listFragment = document.createDocumentFragment()
avengers.forEach(avenger => {
const avengerItem = document.createElement('li')
avengerItem.innerHTML = `<p style="font-size: 20px">${avenger.name}</p><span class="delete" data-id=${avenger.id} onclick="onDelete(event)" style="cursor: pointer;">❌</span>`
avengerItem.classList.add('avenger')
listFragment.appendChild(avengerItem)
})
avengersList.appendChild(listFragment)
}
// delete click event handler
const onDelete = e => {
                dispatch({
                    type: 'REMOVE_AVENGER',
                    payload: {
                        id: e.target.dataset.id
                    }
                })
            }
// subscribing renderAvengers to execute on state change
subscribe(renderAvengers)
addAvenger.addEventListener('click', addAvengerHandler)
input.addEventListener('keypress', enterAvengerHandler)
</script>
</body>
</html>
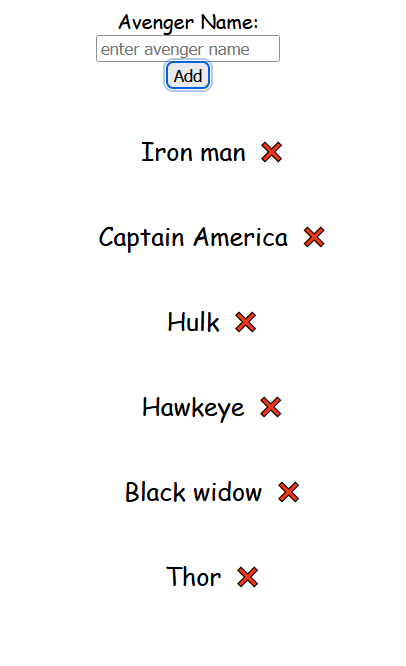
The above creates a simple web app that accepts an avenger name in the text input and adds it to the list of avengers. Each avenger will have a delete option to remove itself from the list. You can copy the code and test it.
Go through the above code carefully. We'll now discuss the redux specific things of the code.
<script src="https://cdnjs.cloudflare.com/ajax/libs/redux/4.2.0/redux.min.js" integrity="sha512-1/8Tj23BRrWnKZXeBruk6wTnsMJbi/lJsk9bsRgVwb6j5q39n0A00gFjbCTaDo5l5XrPVv4DZXftrJExhRF/Ug==" crossorigin="anonymous" referrerpolicy="no-referrer"></script>
With this script tag we get the access to Redux object via CDN.
const { getState, dispatch, subscribe } = Redux.createStore(avengersReducer)
Here we call the createStore with avengersReducer and destructure the getState, dispatch and subscribe methods that it returns.
subscribe(renderAvengers)
Here we add renderAvengers function to the subscribers of the state. So that it executes at every state change and re-renders the avengers list in UI to reflect the updated avengers.
const renderAvengers = () => {
const avengers = getState()
avengersList.innerHTML = ''
const listFragment = document.createDocumentFragment()
avengers.forEach(avenger => {
const avengerItem = document.createElement('li')
avengerItem.innerHTML = `<p style="font-size: 20px">${avenger.name}</p><span class="delete" data-id=${avenger.id} onclick="onDelete(event)" style="cursor: pointer;">❌</span>`
avengerItem.classList.add('avenger')
listFragment.appendChild(avengerItem)
})
avengersList.appendChild(listFragment)
}
renderAvengers gets the updated state, clears the previous list of avengers in UI, and updates the UI with a list of all the updated avengers.
const addAvengerHandler = () => {
dispatch({
type: 'ADD_AVENGER',
payload: {
avenger: {
id: ++count,
name: input.value,
}
},
})
input.value = ''
}
The addAvengerHandler function is executed when we add a new avenger's name in the input and it uses the dispatch function to dispatch an action object of type 'ADD_AVENGER' with avenger id and name in the payload.
const onDelete = e => {
dispatch({
type: 'REMOVE_AVENGER',
payload: {
id: e.target.dataset.id
}
})
}
The onDelete function is executed when we click on the cross icon beside an avenger's name to remove it from the list. It dispatches the action object with the type 'REMOVE_AVENGER' and the id of the avenger in the payload.
Go through the entire HTML code again to understand the flow properly.
Now that you understand the flow, let's implement our own createStore() function using the principles of the Observer design pattern.
Redux implementation
const createStore = (reducer) => {
    let state
    let listeners = []

    const getState = () => state

    const dispatch = (action) => {
        state = reducer(state, action)
        listeners.forEach(listener => listener())
    }

    const subscribe = (listener) => {
        listeners.push(listener)
        return () => {
            listeners = listeners.filter(l => l !== listener)
        }
    }

    return {
        getState,
        dispatch,
        subscribe
    }
}

const Redux = {
    createStore
}
The above code is fairly simple to understand if you understand how we implement the observer design pattern, in case you still haven't read my article on observer pattern, you can read it here.
So, we have state and listeners variables. The state will contain an array of avengers and listeners will contain an array of functions(subscribers) that will be executed in case of a state update.
getState simply returns the state.
subscribe adds a new function to the listeners array and also returns an unsubscribe function that can be used to unsubscribe from the store if needed.
dispatch calls the reducer function that the createStore accepts and stores the return value in the state variable and then executes all the functions in the listeners array.
Now add the above code to the start of our javascript code and remove or comment the redux CDN script tag and test if the state is managed properly as expected.
That's it, that was the mystery behind redux. Now demystified. Don't just keep this knowledge to yourself, share it with others by sharing this article with them ;-)
Btw this is just the first article in a series of articles. Read the following articles to understand more about Redux.
Redux demystified - 2: combineReducers
Subscribe to my newsletter to be notified of the next article. Hope you understood how redux works.